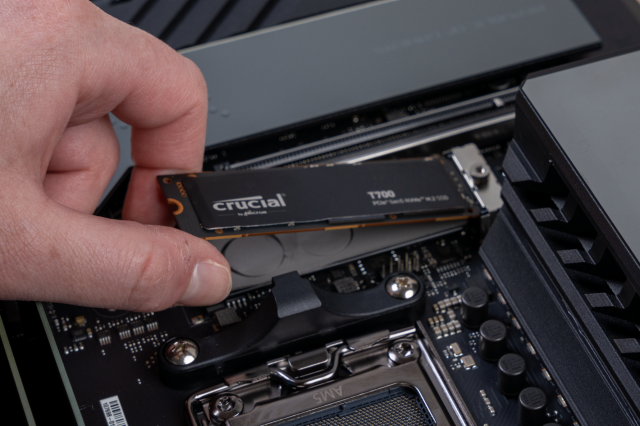
Installing an additional SSD in your computer can significantly enhance its performance and storage capacity. This guide will walk you through the steps to successfully install an additional SSD in your system.
Gather the Necessary Parts and Tools
Before you begin, ensure you have the following parts and tools:
- An open drive bay in the computer
- An open SATA data connection on the motherboard
- An SSD drive
- A screwdriver to open the case and secure the drive
- A SATA data cable
- An available SATA power connector
- An adapter if the SSD will be installed in a bay meant for a 5.25-inch drive
Ensure You Have Space for the SSD
Before proceeding, check the following:
- Look for available drive bays in your computer case.
- Verify that your motherboard has open SATA connections.
- Note that most laptops may not have space for a second SSD.
Prepare for Installation
To prevent any damage during installation, follow these steps:
- Use an anti-static wrist strap or ground yourself to avoid static discharge.
- Unplug your PC from power.
Open the Computer Case
To access the internal components, do the following:
- Use a screwdriver to remove the screws holding the case together.
- Carefully remove the side panel to access the internal components.
Locate an Open Drive Bay
Next, find a suitable location for the additional SSD:
- Identify a suitable bay for the SSD (typically a 2.5-inch bay).
- If no 2.5-inch bays are available, consider using a 2.5 to 5.25-inch adapter.
Install the SSD
Now, install the additional SSD:
- If using a drive caddy, remove it and insert the SSD into the caddy.
- If there are no caddies, slide the SSD directly into the bay and secure it with screws or built-in fasteners.
- Reinstall the drive caddy if applicable.
Connect the SSD to the Motherboard
To connect the SSD, follow these steps:
- Locate a free SATA data cable port on the motherboard.
- Connect one end of the SATA data cable to the SSD and the other end to the motherboard.
Connect the Power to the SSD
Next, connect the power:
- Locate a free SATA power connector from the power supply.
- If no free connectors are available, use a Molex to SATA power adapter or a power splitter.
- Plug the SATA power connector into the SSD (the longer connector).
Verify All Connections
Before closing the case, ensure everything is connected properly:
- Ensure that all cables are securely connected and seated properly.
- Check for any loose or unplugged wires.
Close the Computer Case
To finish up, do the following:
- Replace the side panel and secure it with screws.
- Reconnect all external cables and power on the computer.
Initialize the New SSD in Windows
Once your computer is powered on, you need to initialize the additional SSD:
- Navigate to Control Panel > Disk Management.
- In Windows 7, click the Start button, right-click Computer, and choose Manage to access Disk Management.
- If prompted to initialize the disk, select GPT (GUID Partition Table) for Windows 10/8.1/8 or MBR (Master Boot Record) for Windows 7 and click OK.
- If the setup wizard does not start automatically, find the new SSD in the Disk Management window (it will be unallocated).
- Right-click on the unallocated space and select New Simple Volume.
- Follow the prompts in the wizard, ensuring the partition size matches if you want a single partition.
- Choose a drive letter if you want to change the default one.
- Use the NTFS file system and leave the allocation unit size as default.
- Optionally, enter a volume label for the SSD.
- Verify the information and click Finish.
Your Second SSD is Now Ready to Use
Your additional SSD is now ready for use. It will be available for saving new files and transferring old files from your original drive to free up space.
How to fix a corrupted PS4?
To fix a corrupted PS4, turn off your PS4 and press and hold the power button until you hear two beeps (this takes about 7 seconds). Connect your controller with a USB cable and press the PS button. Select "Rebuild Database" from the Safe Mode menu to scan the drive and create a new database of all content.
How to fix corrupted world PS4?
If your world is corrupted on PS4, the file is still there with the other saved worlds; it just needs to be re-uploaded. You can do this by going to application data in your PS4 menu and uploading from your online backups.
What does it mean when it says PS4 data corrupted?
When a PS4 repeatedly displays "corrupted data" messages, it usually indicates that the internal HDD is failing, which means the internal HDD will need to be replaced.
What does it mean when it says your game is corrupted?
File corruption may result from problems with your storage device, such as a hard drive or SSD. It can also be caused by malware, interference from other applications, incompatible mods, or faulty RAM or storage devices.
If you liked it and want to know more content similar to Additional SSD: How to Install in Your Computer. Visit our category Tutorial


By posting you agree to the Privacy Policy
Basic information on data protection